Your cart is currently empty!
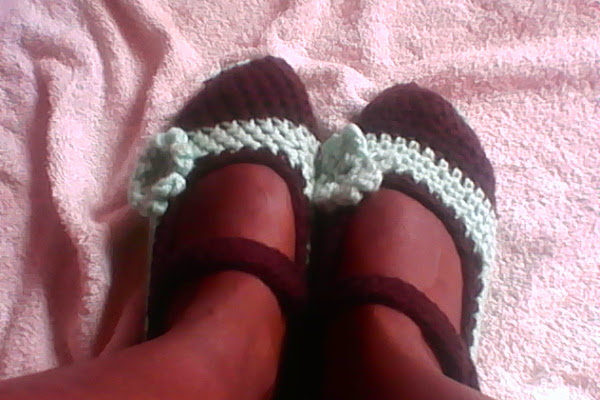
Crochet slipper pattern
Materials Used
- Butterfly Chunky thread Balls (Two Dark Brown and One green)
- Hook size 4 mm
- Four pieces of contrasting yarn to use as markers
- 2 buttons – the ones I used have a diameter of 1.5 cm.
- (Tapestry Needle)
Stitches used
- ch – chain
- Sc – single crotchet
- Sc2tog – single crochet two stitches together (decrease)
Gauge
12 stitches and 18 rows to 10 cm or 4 inches measured over single crochet using a 4 mm hook.
Sizing
It doesn’t matter too much if your gauge is not exact because the slippers are designed to stretch to fit, but you don’t want your gauge to be too different as then your slippers might not fit. If your feet at are at the smaller end of the range and you are getting a couple more than 12 stitches to 10cm/ 4 inches, then the slippers will probably still fit, especially if you are using wool rather than cotton. If not, try a larger hook size. If your feet are at the larger end of the range and you are getting fewer stitches to 10 cm/ 4 inches, then, again, the slippers will probably still fit, but if not, try a smaller hook size.
METHOD
Toe-cap
The toe-cap is worked in one continuous round, or spiral as follows:
Foundation chain: using 4 mm hook, chain 6.
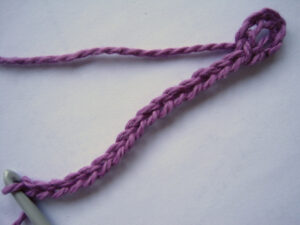
Round 1: Sc into second chain from hook, Sc into next 3 chains, 3 Sc into last chain, then continue Single-crocheting up the other side of chain as follows: Sc into next three chains, 2sc in last chain (12 stitches).
Picture 1: the first round
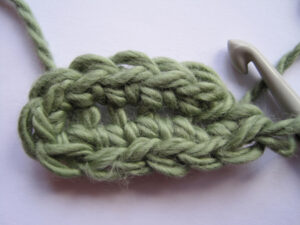
Round 2: Sc into each of next 5 stitches, 3 Sc into next stitch, Sc into each of next 5 stitches, 3 Sc into next stitch (16 stitches)
Round 3: Sc into each of next 6 stitches, 3 Sc into next stitch, Sc into each of next 7 stitches, 3 Sc into next stitch, Sc into next stitch (20 stitches)
Round 4: Sc into each of next 7 stitches, 3 Sc into next stitch, Sc into each of next 9 stitches, 3 Sc into next stitch, Sc into next 2 stitches (24 stitches)
Round 5: Sc into each stitch (24 stitches)
Round 6: Sc into each stitch (24 stitches)
Sole
The sole continues on from the toe-cap, and is worked in rows as follows:
Row 1: Sc into first 8 stitches of round 6. Mark first and last stitch in the row, and also the two stitches of the toe-cap on either side of the row, as shown in picture 2. 1 chain. Turn. (8 stitches)
Picture 2: stitches marked with contrasting yarn
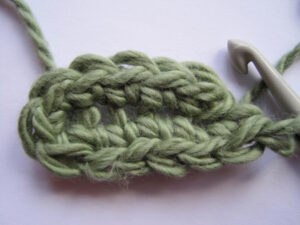
Row 2: Sc into each stitch. 1 chain. Turn. (8 stitches)
Rows 3 – 13: as row 2.
Row 14: 2 Sc into first stitch, Sc into next 6 stitches, 2 Sc into last stitch. (10 stitches). 1 chain. Turn.
Row 15: Sc into each stitch. 1 chain. Turn. (10 stitches)
Rows 16 – 19: as row 15.
Row 20: 2 Sc into first stitch, Sc into next 8 stitches, 2 Sc into last stitch. 1 chain. Turn. (12 stitches)
Row 21: Sc into each stitch. 1 chain. Turn. (12 stitches).
Rows 22-23: as row 21.
Row 24: Sc into first 2 stitches, Sc2tog, sc into next 4 stitches, Sc2tog, sc into last 2 stitches. 1 chain. Turn. (10 stitches)
Row 25: Sc into first 2 stitches, Sc2tog, sc into next 2 stitches, Sc2tog, sc into last 2 stitches. 1 chain. Turn. (8 stitches)
Row 26: Sc into first 2 stitches, Sc2tog. Sc2tog, sc into last 2 stitches. 1 chain. Turn. (6 stitches)
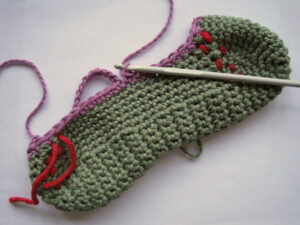
Row 27: Sc into first stitch. Sc2tog, Sc2tog, sc into last stitch. (4 stitches). DO NOT TURN. With contrasting thread mark first and last stitches in rows 26 and 27.
Picture 3: toe-cap and sole, showing marked stitches
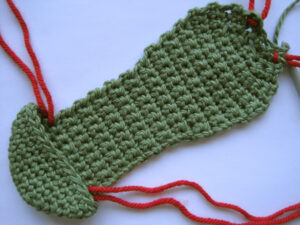
Upper
You will now work the rest of the slipper in rounds.
Round 1: with bottom of sole facing you, Sc into each row end (26 stitches) Sc into each stitch on toe-cap (17 stitches) Sc up the row ends on the other side (26 stitches) and Sc into the 4 stitches on the back. (73 stitches). Move the markers as you crochet so that the ends of the each side, toe-cap and back are marked.
Round 2: repeat round 1
In rounds 3 – 6 you will decrease at both ends of each side, and at each side of the toe-cap by single-crocheting together the first two and last two stitches of both sides and the toe-cap as follows:
Round 3: Sc2tog, sc into next 22 stitches, Sc2tog, Sc2tog, sc into next 13 stitches, Sc2tog, Sc2tog, Sc into next 22 stitches, Sc2 tog, Sc into last 4 stitches (67 stitches)
Round 4: Sc2tog, Sc into next 20 stitches, Sc2tog, Sc2tog, Sc into next 11 stitches, Sc2tog, Sc2tog, Sc into next 20 stitches, Sc2 tog, Sc into last 4 stitches (61 stitches)
Round 5: Sc2tog, Sc into next 18 stitches, Sc2tog, Sc2tog, Sc into next 9 stitches, Sc2tog, Sc2tog, Sc into next 18 stitches, Sc2 tog, Sc into last 4 stitches (55 stitches)
Round 6: Sc2tog, sc into next 16 stitches, Sc2tog, Sc2tog, sc into next 7 stitches, Sc2tog, Sc2tog, sc into next 16 stitches, Sc2tog, sc into last 3 stitches, and slip stitch into last stitch. Cut yarn leaving a loose end to weave in. (49 stitches)
The final two rounds are worked in a contrasting yarn. First of all you make a chain and button hole for the strap, and then you join the yarn to the slippers and continue shaping the upper as follows:
Strap: With colour for trim, chain 5. Slip stitch into chain furthest from hook to form a loop (this will be the buttonhole: if your buttons have a diameter greater than 1.5 cm, then you may need to increase the size of this loop). Then chain 16.
Picture 4: strap
Left slipper
Round 7: Join chain to left slipper on the right side in the 8th stitch from the front right corner (see picture 5 ). You will then continue crocheting around the upper, decreasing at the corners and heel as in rounds 3 – 6 as follows: sc into next 7 stitches, Sc2tog, sc into 4 stitches along back of slipper, Sc2tog, sc into next 14 stitches, Sc2tog, Sc2tog, sc into next 5 stitches (across toe-cap) Sc2tog, Sc2tog, sc into next 7 stitches (the last sc goes into the same stitch that you joined the chain to the slipper). Then sc up one side of the chain you made (16 stitches), sc into each chain in the loop (5 stitches), and sc back down the other side of the chain (16 stitches).
Picture 5: joining the strap to the left slipper
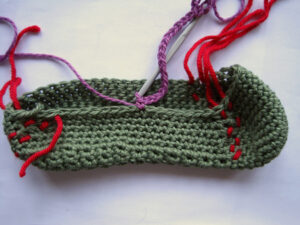
Picture 6: round 7, just before crocheting up the strap
Right slipper
Round 7: Join chain to right slipper on the left side in the 8thstitch from the front left corner. You will then continue crocheting around the upper, decreasing at the corners and heel as in rounds 3 – 6 as follows: sc into next 6 stitches, sc2tog, sc2tog, sc into next five stitches (across toe-cap), sc2tog, sc2tog, sc into next 14 stitches, sc2tog, sc into 4 stitches, sc2tog, sc into next 8 stitches (the last sc goes into the same stitch that you joined the chain to the slipper). Then sc up one side of the chain you made (16 stitches), sc into each chain in the loop (5 stitches), and sc back down the other side of the chain (16 stitches).
Both slippers
Round 8: sc into each sc along top of slipper until you come back to the strap, then cast off.
To finish: Weave in ends, and sew on buttons.
Courtesy of http://thelittlehousebytheseawordpress.com
Happy Hooking
Appelles

Leave a Reply